How to Create Solana Token - Step-by-Step (Code & No-Code Guide)
Published on June 30, 2025 by Tokenry Team

Image Credit: Unsplash
Thinking about making your own token but feeling confused or unsure? You’re not alone. Many people want to create Solana token but aren't sure how or where to begin.
In this easy guide, I'll explain all the important steps clearly. You'll learn exactly what you need, things to think about carefully, and common mistakes you should avoid for a successful token launch.
What is a Solana SPL Token?
Tokens on Solana aren't smart contracts like Ethereum or BNB Chain. Instead, they are SPL tokens, managed by Solana's built-in Token Program. SPL tokens follow simple rules similar to ERC20 but run directly on the Solana blockchain.
When you create a token, you can customize details such as decimals, total supply, mint authority, freeze authority, and token metadata. You can mint tokens easily into your Solana wallet. SPL-token creation doesn't require complex smart contract knowledge or coding experience.
Method 1: No-Code Solana Token Creation (Beginner Friendly)
Some tools let you create and manage a new token on the Solana network without writing any code.
These platforms interact directly with the Solana Program Library to help you easily create a token on Solana and send it to your wallet address. It is perfect if you are not a developer but still want to launch your own token quickly and securely.
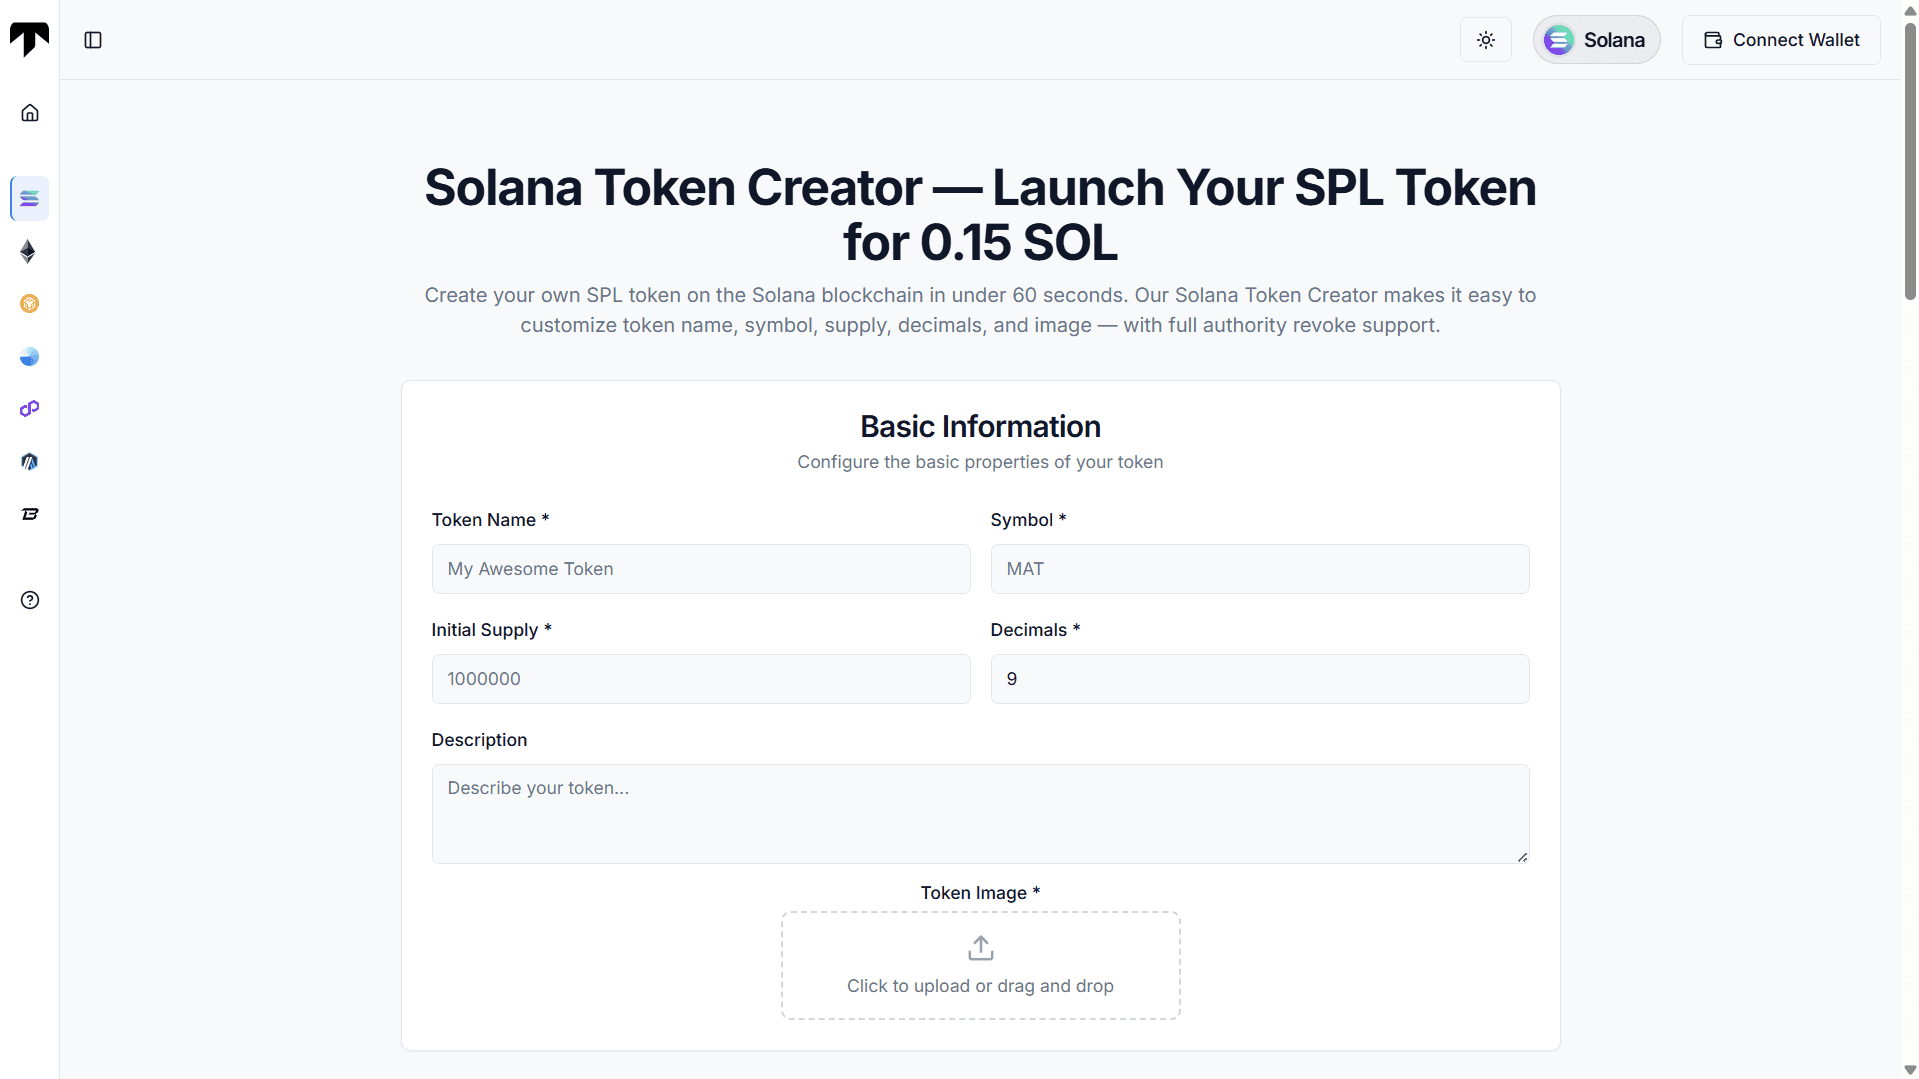
In this step-by-step guide, I will show you how to use Tokenry’s solana token creator to build and launch your token on the Solana blockchain. It costs 0.15 SOL in total and includes everything you need on-chain metadata using the token extensions program, revoked authorities for better security, and a smooth mint setup.
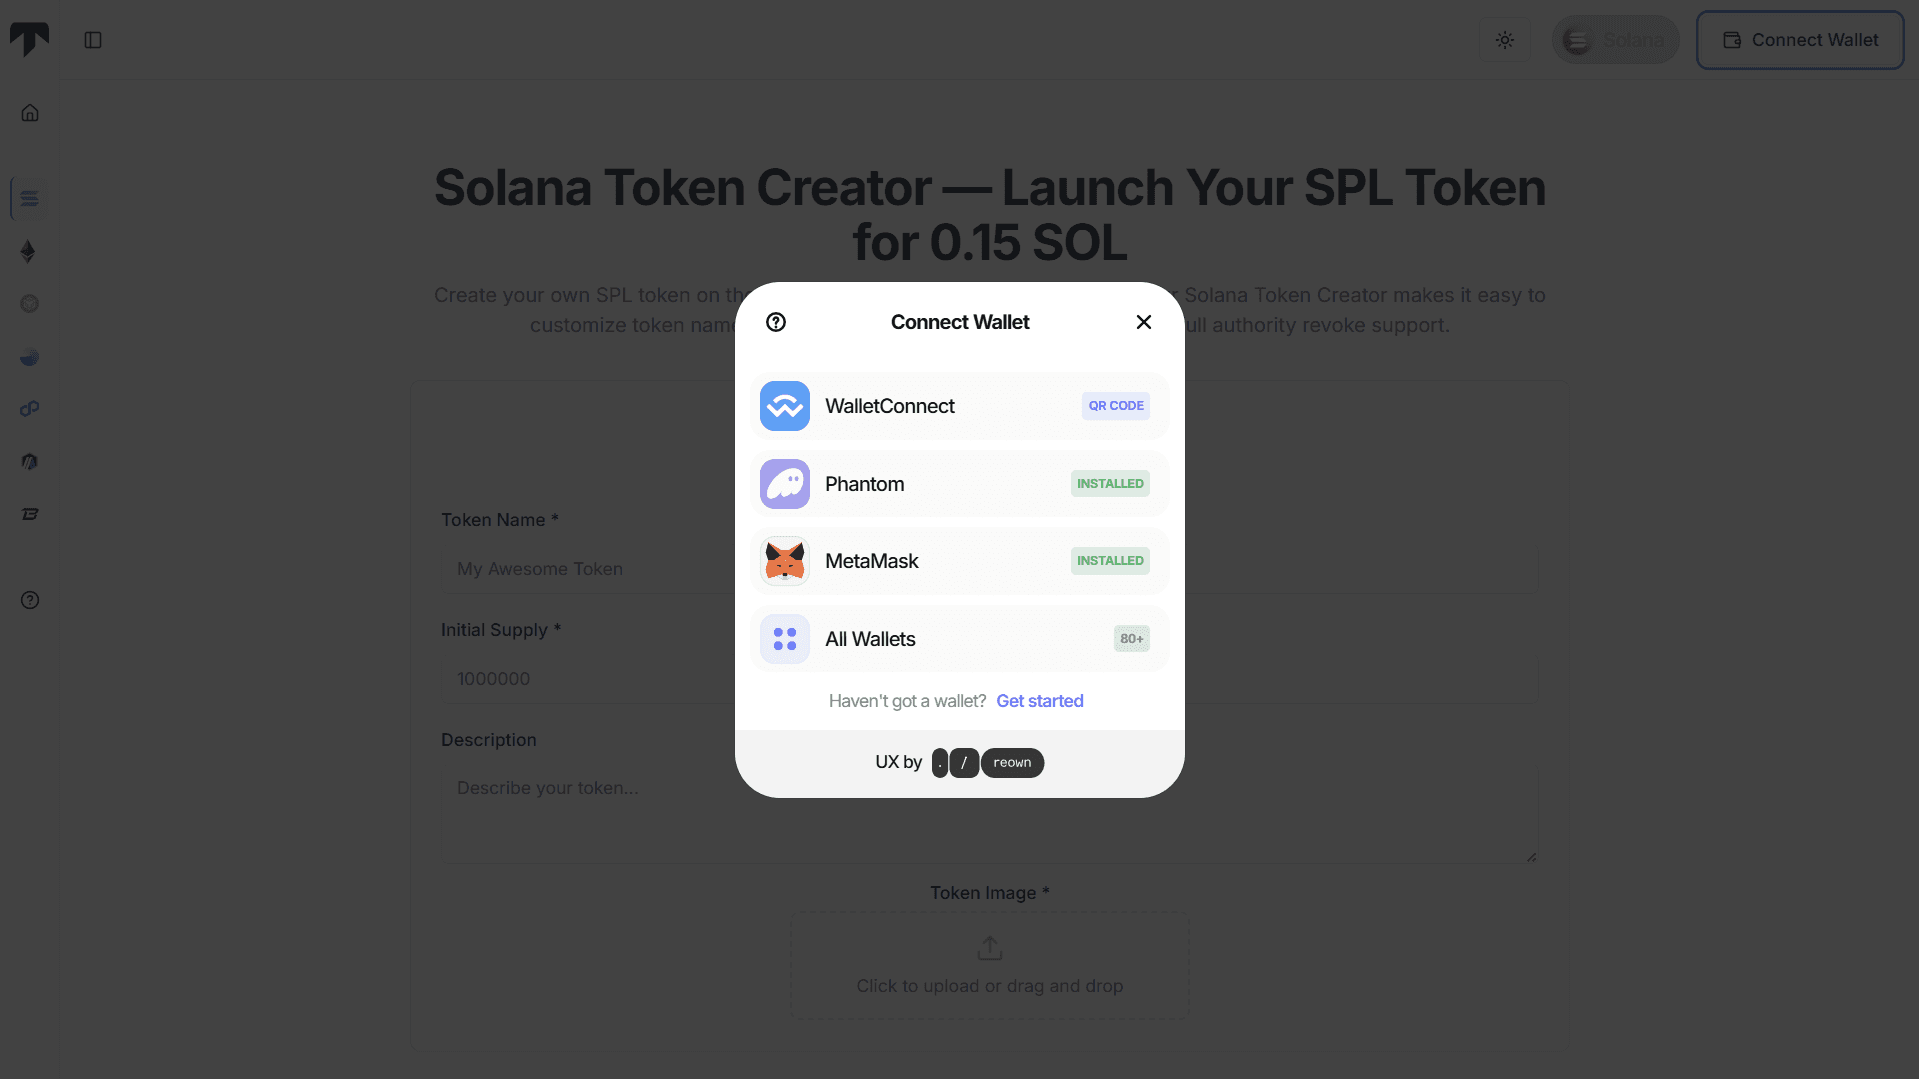
Step 1. Connect Your Solana Wallet
Connect any Solana-compatible wallet like Phantom or Solflare. Make sure you have at least 0.2 SOL in your wallet to cover all on-chain actions.
The full process usually costs under 0.16 SOL, but keeping a little extra helps prevent failed transactions. Once connected, your wallet will be used to create and manage your new token automatically.
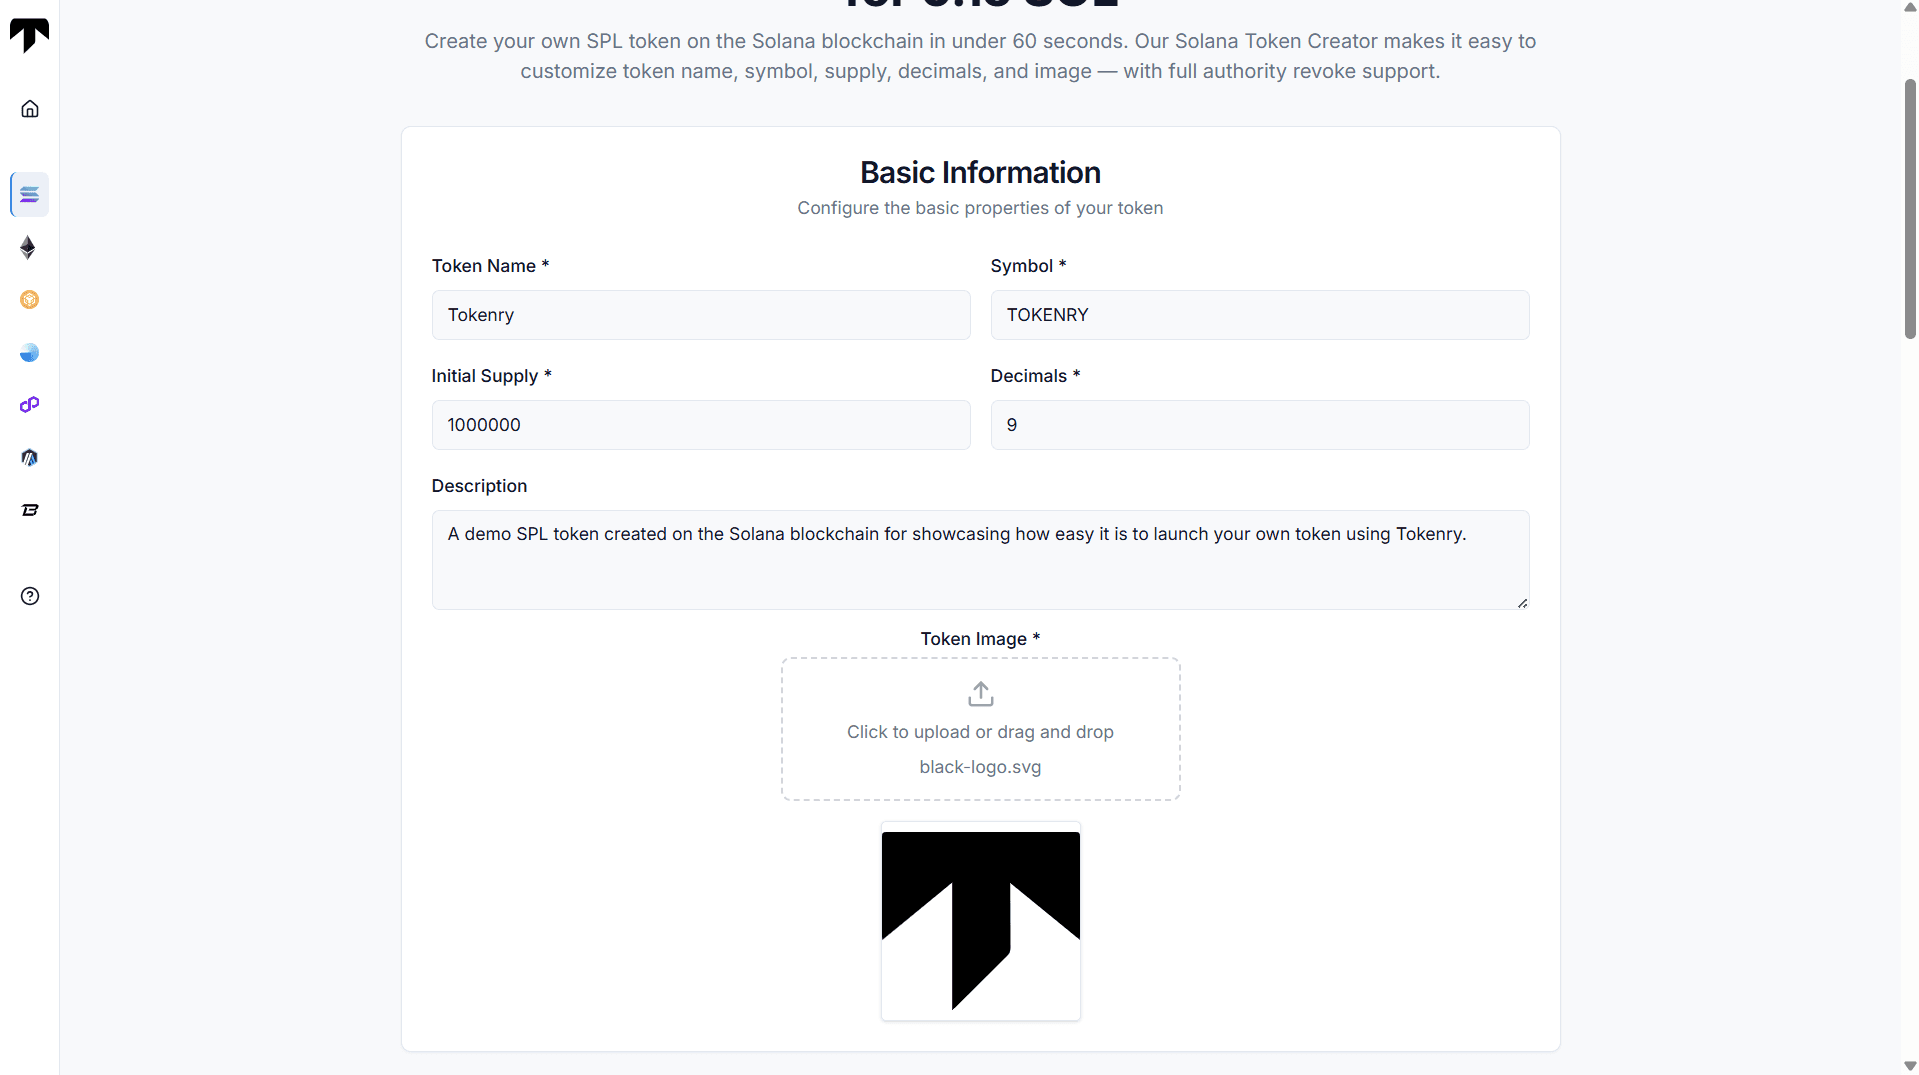
Step 2. Enter Token Details (Name, Symbol, Decimals)
Enter your token name, symbol, total supply, and decimals. Most tokens on the Solana blockchain use 9 decimals by default. Add a short description and upload a token image, ideally 500x500 pixels.
This information becomes part of your token metadata and helps users identify your token clearly.
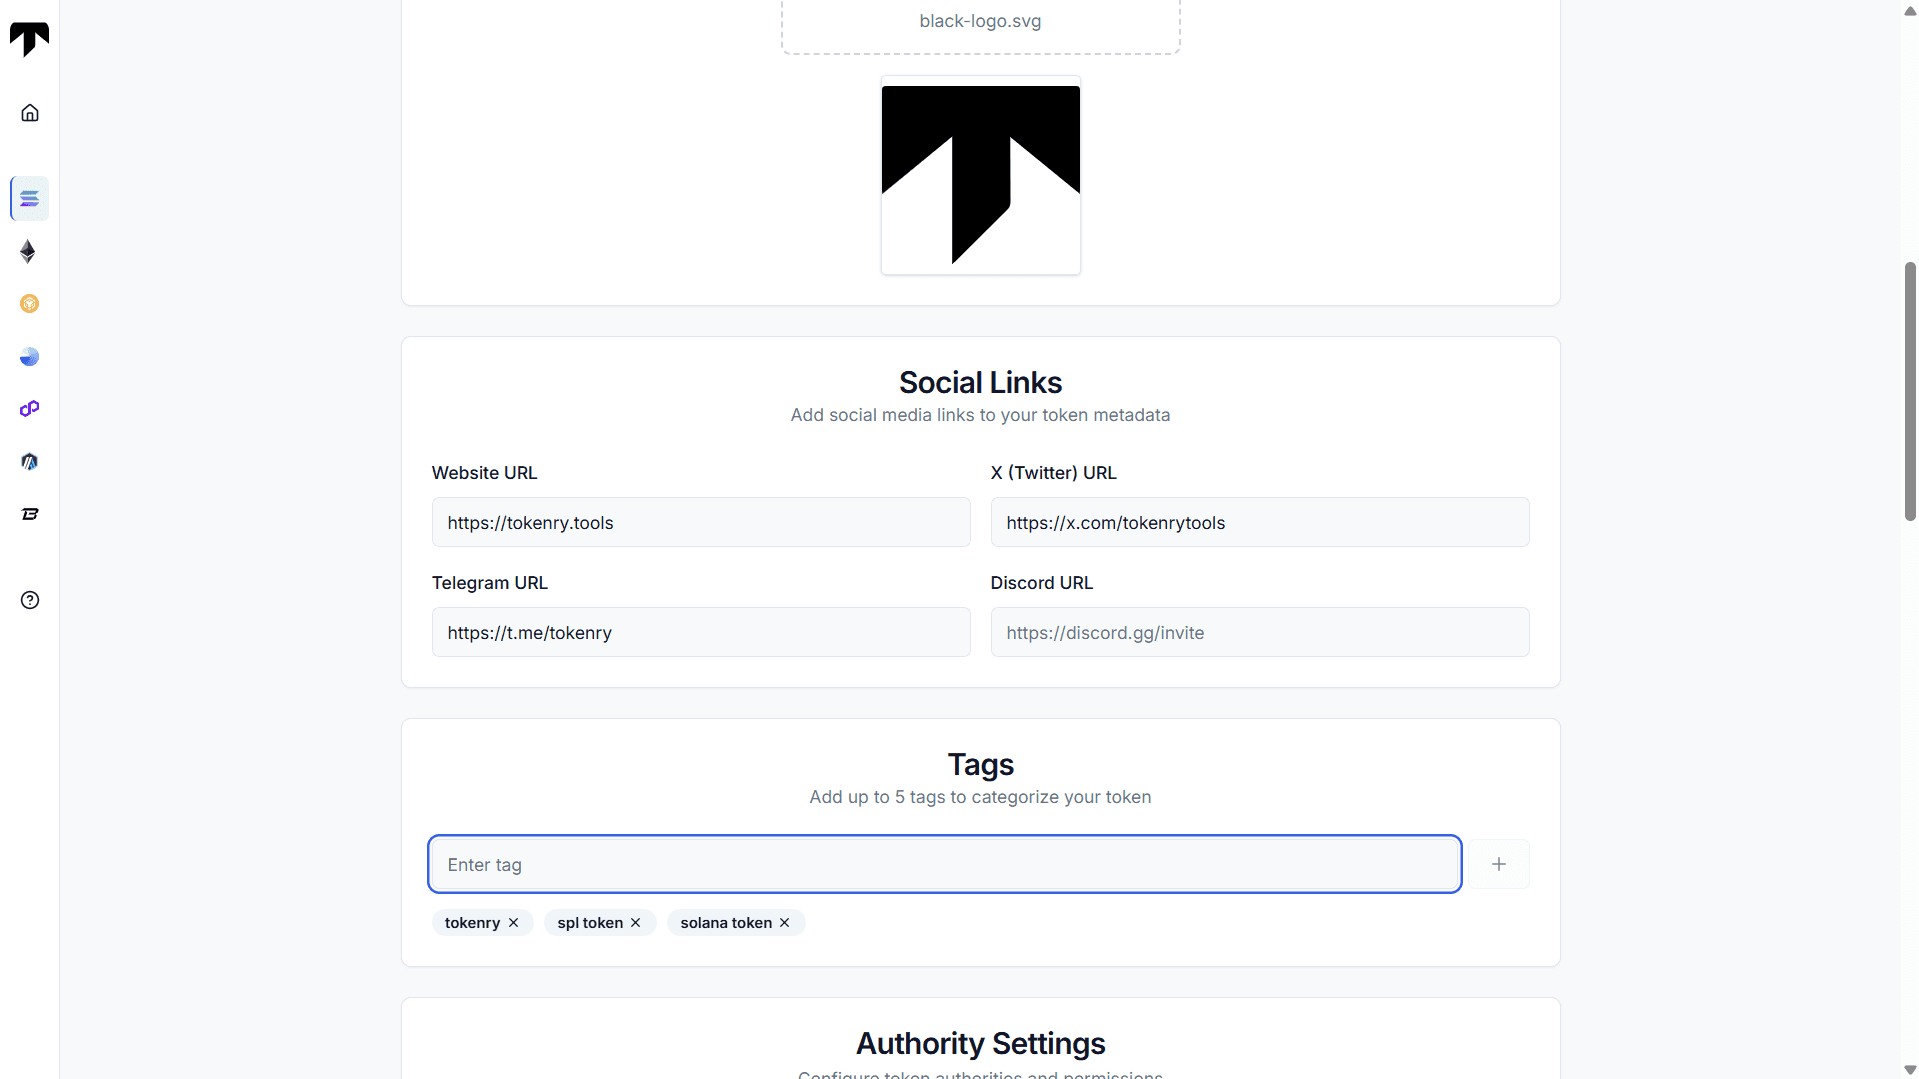
Step 3. Add Metadata, Tags & Social Links
This step is optional but recommended. Add links like your website, Twitter, or Telegram to enrich your on-chain metadata. Even if you skip some links, the available data helps build trust.
These links are stored on-chain and used by explorers and token platforms to show details about your token.
Step 4. Revoke Mint, Freeze & Update Authority
Revoking mint, freeze and update authority increases trust and helps your token pass basic security checks. Mint authority locks the token supply. Freeze authority allows free transfer. Update authority prevents metadata changes.
If not revoked, sites like DexScreener may flag your token as risky. Always revoke mint and freeze at a minimum.
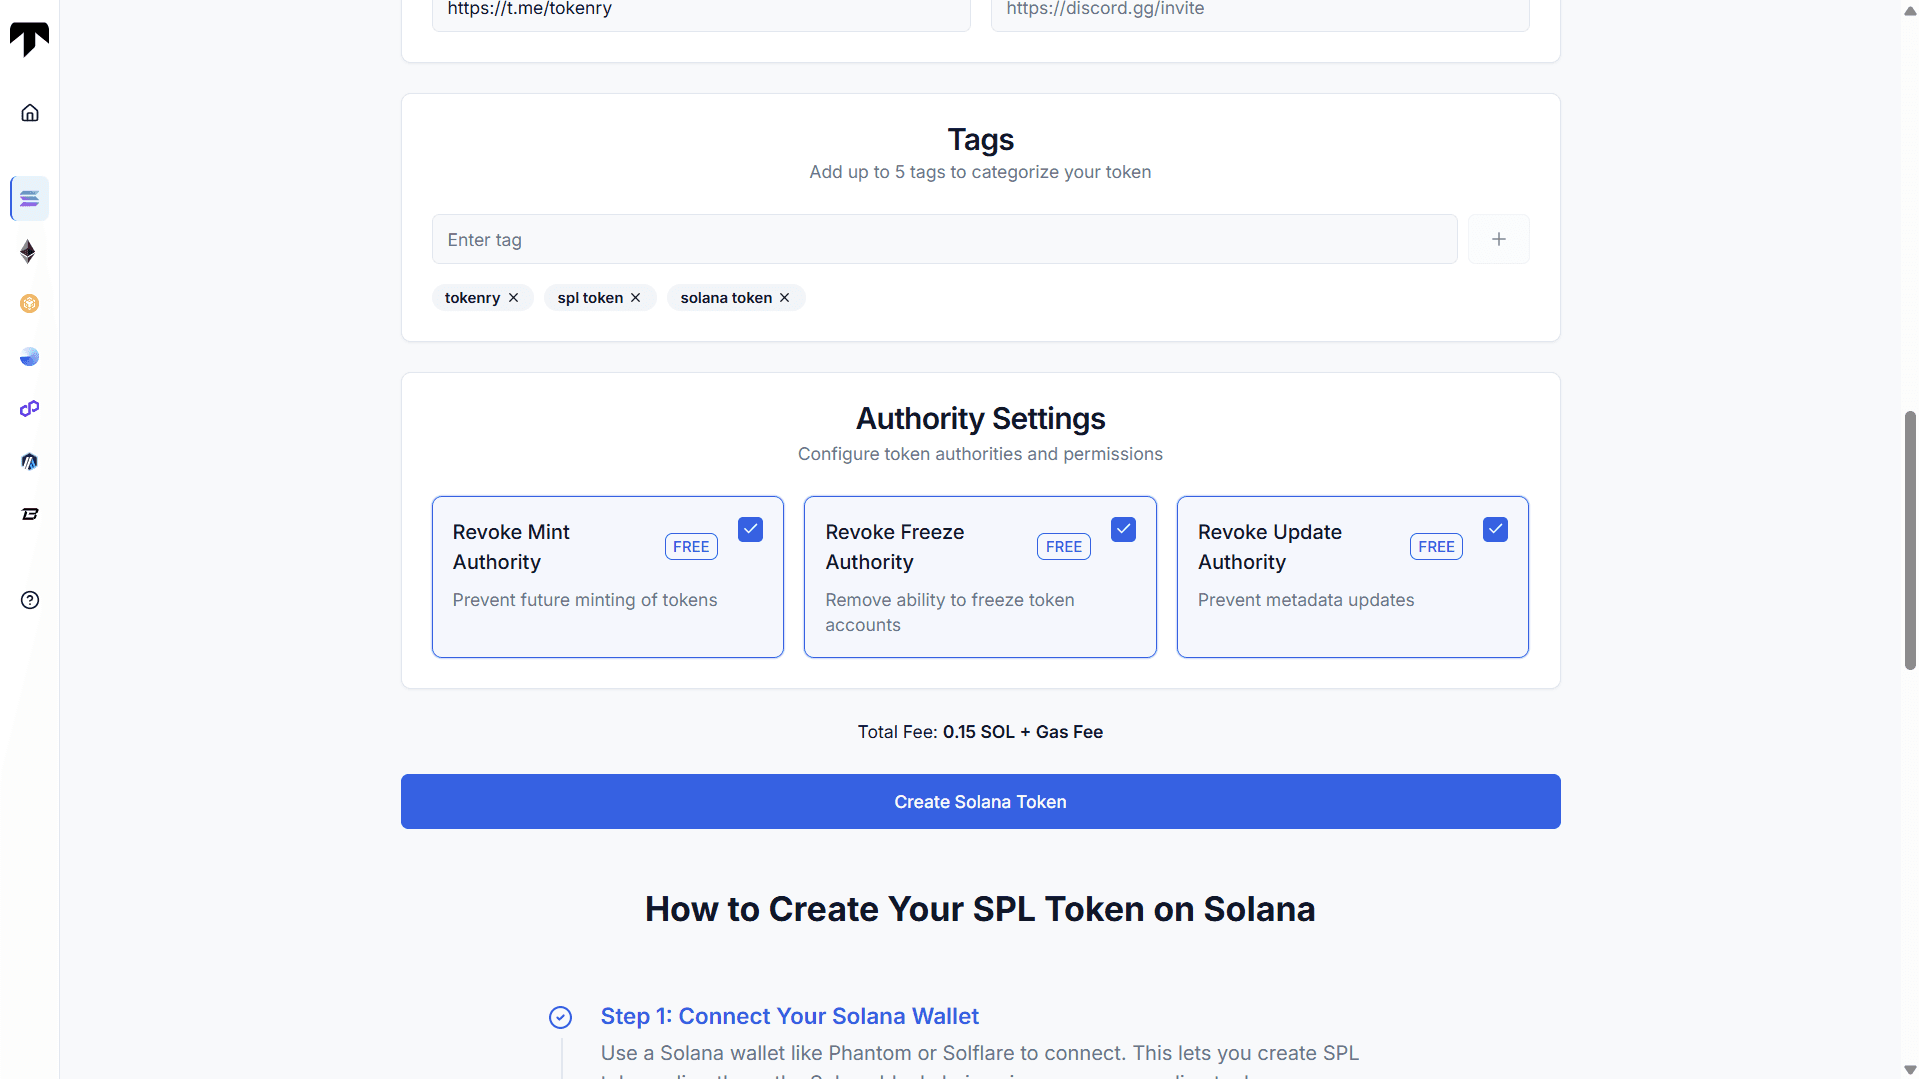
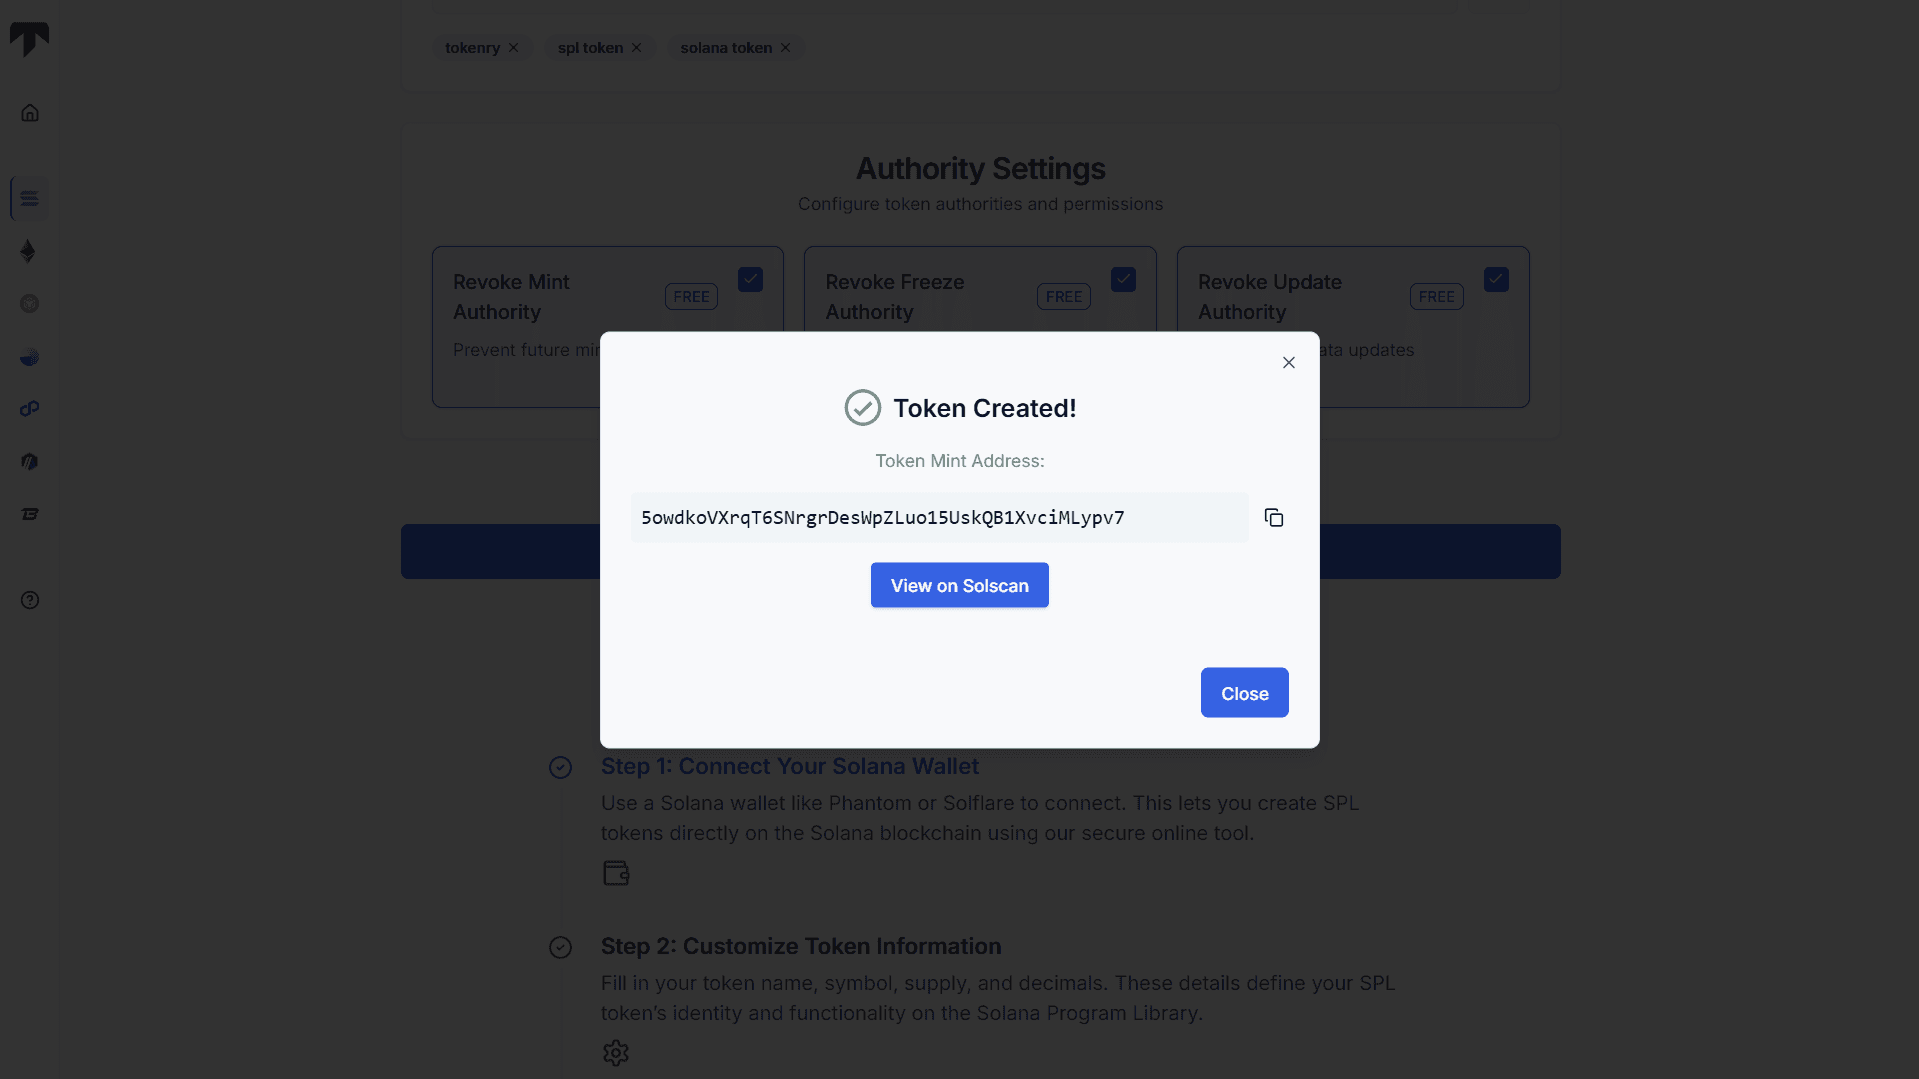
Step 5. Approve the Token Creation Transaction
Review all token details, then click the "Create Solana Token" button. Your wallet will show a transaction to sign. Once approved, your token will be minted and sent to your wallet in seconds.
This simple no code method lets anyone launch a token easily without needing technical knowledge.
Method 2: Create Solana Token Using CLI (For Developers)
If you want full control over how your token is created and managed, the Solana Command Line Interface (CLI) is your best option.
This method gives you direct access to the blockchain and is ideal for developers who prefer a hands-on approach. You can customize every part of your token manually from minting to metadata to revoking permissions.
Step 1. Install Solana CLI & SPL-Token Tool
To begin, install the Solana CLI on your system. This is the official tool used to interact with the Solana network through the terminal.
sh -c "$(curl -sSfL https://release.solana.com/stable/install)"Once installed, verify that it's working:
solana --versionThis confirms the CLI is ready to use.
Step2. Generate or Import Your Solana Keypair
A keypair is your wallet file. It allows you to sign transactions and control assets on the Solana blockchain.
To create a new one, run:
solana-keygen newIf you already use a wallet like Phantom, you can export the private key and import it into the CLI by converting it to the keypair JSON format.
Step 3. Set Network (Devnet/Mainnet) and Fund Wallet
You need to choose which network to interact with. For real token launches, use the mainnet; for testing, use devnet.
Example to connect to mainnet:
solana config set --url https://api.mainnet-beta.solana.comMake sure your wallet has at least 0.2 SOL to cover token creation and transaction fees.
Step 4. Create the Token Using SPL-Token Command
Now you’ll create the token itself. This generates a mint address, which acts as the unique ID of your token.
spl-token create-token --decimals 9The --decimals option sets how divisible your token is. 9 is common for fungible tokens.
Step 5. Create an Associated Token Account
To hold the tokens, you need a token account linked to your wallet and token mint.
spl-token create-account <MINT_ADDRESS>This step creates the account where your tokens will be stored and managed.
Step 6. Mint Tokens to Your Wallet
Now you mint your supply to the token account. This defines how many tokens are created initially.
spl-token mint <MINT_ADDRESS> <AMOUNT>Example:
spl-token mint So1ToKen1234Abcd 1000000You can always choose to mint more later, unless you revoke mint authority.
Step 7. Add Token Metadata
Adding metadata makes your token easier to identify in wallets and explorers. This includes the name, symbol, and image.
spl-token initialize-metadata <MINT_ADDRESS> "BananaCoin" "BNNA" https://example.com/meta.jsonThe link should point to a JSON file with token name, symbol, description, and image URL.
Step 8. Revoke Mint, Freeze & Update Authorities
This is an important security step. Revoke mint, freeze, and metadata update authority to lock your token configuration.
spl-token authorize <MINT_ADDRESS> mint --disable
spl-token authorize <MINT_ADDRESS> freeze --disable
spl-token authorize <MINT_ADDRESS> metadata --disable
This ensures no one can change the token, mint new supply, or block transfers.
Step 9. Verify Token on Solana Explorer or Phantom
Once complete, go to Solana Explorer or Solscan and paste your mint address. You’ll see your token name, supply, metadata, and transaction history displayed publicly.
Final Thoughts on Solana Token Creation
Solana makes it simple for anyone to launch a token, whether you are a beginner using a no-code tool or a developer working through the CLI. With low fees, fast transactions, and flexible tools, creating a token on the Solana blockchain is now more accessible than ever.
Frequently Asked Questions
How much SOL do I need to create a token on Solana?
You usually need around 0.15 to 0.2 SOL for the full process. This covers the minting, metadata upload, token account creation, and revoking authorities. Costs are low due to Solana’s cheap network fees.
Can I create a Solana token without coding?
Yes, you can easily create a token using no-code tools like Tokenry’s SPL token creator. These tools handle all the complex steps like minting and metadata in the background, so you don’t need any technical skills.
What is the difference between mint authority and freeze authority?
Mint authority lets someone create more tokens after launch. Freeze authority allows blocking token transfers. Revoking both makes your token more secure and helps it pass basic security checks on public trackers.
Where can I see my token after creating it?
After creation, you can view your token on Solana Explorer or Solscan using the mint address. You’ll see all details like name, symbol, metadata, and total supply linked to your wallet.
Can I update token details later?
Only if you do not revoke the update authority. Once revoked, metadata like name, symbol, and image becomes permanent. That’s why it’s important to finalize everything before locking your token settings.